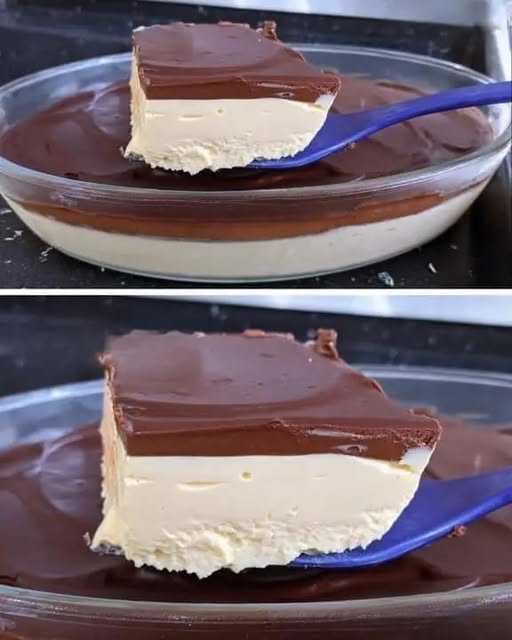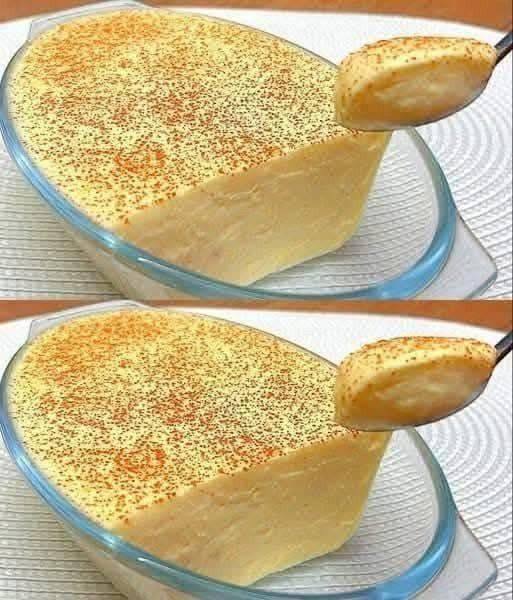
If you love quick no-bake desserts with creamy texture, soft biscuit layers, and endless flavor possibilities, these layered whipped cream dessert cups are the perfect sweet treat to make at home. This easy dessert recipe combines cold whipped cream, sweetened condensed milk, vanilla flavor, crushed biscuits, and delicious mix-ins to create a smooth, rich, bakery-style dessert without baking.
These creamy dessert cups are light, fluffy, customizable, and perfect for parties, family gatherings, holidays, or late-night dessert cravings. The combination of airy whipped cream and soft biscuit layers creates a texture similar to mousse cake or no-bake trifle desserts.
Whether you enjoy chocolate desserts, fruit parfaits, biscuit puddings, or easy no-bake recipes, this homemade layered dessert delivers rich flavor and beautiful presentation with minimal effort.
This dessert is especially popular because it is:
- No-bake and easy to prepare
- Made with simple ingredients
- Ready in minutes
- Perfect for individual serving cups
- Light yet satisfying
- Easily customizable
- Great for beginners
- Ideal for hot weather desserts
The creamy layers combined with biscuits and flavorful toppings create a dessert that tastes elegant while requiring very little preparation.
Why No-Bake Desserts Continue to Trend
No-bake desserts remain some of the most searched recipes online because they are:
- Fast
- Convenient
- Beginner-friendly
- Versatile
- Perfect for warm seasons
Unlike baked cakes or pastries, chilled cream desserts require no oven and very little cleanup. They also allow endless flavor combinations using fruits, chocolate, nuts, biscuits, syrups, or coffee.
This whipped cream dessert cup recipe fits perfectly into trending categories such as:
- Easy no-bake desserts
- Creamy layered desserts
- Biscuit pudding recipes
- Quick dessert cups
- Whipped cream parfaits
- Mini trifle desserts
- Cold dessert recipes
- Condensed milk desserts
- Simple homemade sweets
- No oven desserts
The Secret to Perfect Whipped Cream
The foundation of this dessert is properly whipped heavy cream.
Heavy cream creates:
- Light texture
- Stable structure
- Rich flavor
- Smooth consistency
The high fat content allows air to become trapped during whipping, creating a fluffy texture that transforms simple cream into a luxurious dessert base.
Cold temperature is essential because warm cream does not whip properly. Chilling both the bowl and whisk improves whipping speed and texture significantly.
Properly whipped cream should be:
- Smooth
- Airy
- Thick but soft
- Easy to spread or pipe
Soft peaks are the ideal stage for this dessert because they hold shape while remaining creamy and delicate.
Why Condensed Milk Works So Well
Condensed milk adds:
- Sweetness
- Creaminess
- Slight caramel flavor
- Smooth texture
Unlike regular sugar, condensed milk blends seamlessly into whipped cream without leaving grainy texture.
It also helps create:
- Rich mouthfeel
- Stable consistency
- Balanced sweetness
The slight caramelized flavor of condensed milk pairs beautifully with vanilla, biscuits, fruits, and chocolate.
For those who enjoy lighter desserts, sweetness can easily be adjusted by changing the amount of condensed milk or powdered sugar.
Vanilla Makes the Dessert Taste Bakery-Style
Vanilla essence may seem simple, but it dramatically improves the flavor of cream-based desserts.
Vanilla:
- Enhances sweetness perception
- Adds warmth
- Creates bakery aroma
- Balances dairy richness
Even a small amount transforms plain whipped cream into something that tastes more refined and dessert-like.
Pure vanilla extract or vanilla essence both work beautifully in this recipe.
Why Biscuit Layers Create Perfect Texture
Crushed biscuits are what turn this creamy dessert into a layered treat with structure and contrast.
Biscuits:
- Absorb moisture
- Soften slightly while chilling
- Create cake-like texture
- Add gentle crunch
As the dessert chills, the biscuits soften just enough to resemble layers of soft cake while still maintaining some texture.
Digestive biscuits, tea biscuits, or Marie biscuits all work well because they absorb cream beautifully without becoming mushy too quickly.
Keeping the biscuit pieces slightly uneven creates better texture than turning them into fine crumbs.
Best Add-Ins for Flavor and Texture
One of the best things about this dessert is how customizable it is.
Different add-ins create entirely new flavor profiles while keeping the same creamy base.
Chocolate Additions
Chocolate lovers can add:
- Chocolate chips
- Chopped chocolate
- Cocoa powder
- Chocolate syrup
Chocolate creates richness and slight bitterness that balances sweetness beautifully.
Fruit Additions
Fresh fruit adds freshness and natural sweetness.
Popular options include:
- Banana
- Mango
- Apple
- Strawberries
Fruit also adds juicy texture contrast against the creamy layers.
Nut Additions
Nuts provide crunch and richness.
Excellent choices include:
- Almonds
- Cashews
- Pistachios
Nuts help balance the softness of the cream and biscuits.
Why Layered Desserts Taste Better
Layering is not just for presentation. It improves the overall eating experience.
Each spoonful contains:
- Creamy texture
- Soft biscuit
- Crunchy toppings
- Flavor variation
Layered desserts create contrast and balance, making them feel more exciting and luxurious.
Transparent serving glasses make the layers visually appealing and ideal for parties or gatherings.
The Importance of Temperature
Temperature control is one of the most overlooked aspects of whipped cream desserts.
Cold tools help:
- Cream whip faster
- Air stay trapped
- Texture remain stable
- Peaks hold shape longer
For best results:
- Chill the bowl
- Chill the whisk
- Keep cream refrigerated until needed
Even a few minutes in the freezer can improve whipping results dramatically.
Understanding Whipping Stages
Whipping cream properly is key to achieving the perfect dessert texture.
Stage 1: Liquid
The cream is thin and pourable.
Stage 2: Slightly Thickened
Small bubbles begin forming.
Stage 3: Soft Peaks
The ideal stage for dessert cups.
When lifting the whisk:
- Peaks gently bend
- Texture remains creamy
- Airiness stays intact
Over-whipping creates grainy texture or eventually butter.
Why This Dessert Is Perfect for Entertaining
This easy layered dessert works beautifully for:
- Dinner parties
- Birthday celebrations
- Family gatherings
- Summer desserts
- Holiday sweets
- Potluck events
Individual dessert cups feel elegant while remaining incredibly simple to prepare.
Because they are made ahead and chilled, they are also convenient for entertaining.
Flavor Variations to Try
Chocolate Lover’s Dessert
Add cocoa powder, chocolate chips, and chocolate syrup.
Tropical Fruit Version
Use mango and banana layers.
Coffee Cream Dessert
Mix instant coffee into the cream.
Nutty Crunch Dessert
Layer pistachios and almonds throughout.
Light Yogurt Version
Replace heavy cream with thick Greek yogurt.
Why Chilling Improves Texture
Although the dessert can be served immediately, chilling enhances both flavor and texture.
During chilling:
- Biscuits soften slightly
- Flavors blend together
- Cream stabilizes
- Texture becomes cake-like
Even 15–30 minutes in the refrigerator makes a noticeable difference.
Longer chilling creates softer, richer layers similar to no-bake cake desserts.
Common Mistakes to Avoid
Using Warm Cream
Warm cream struggles to whip properly.
Over-Whipping
Can create grainy or buttery texture.
Adding Watery Fruits
Too much juice may thin the dessert.
Crushing Biscuits Too Finely
Removes texture contrast.
Overmixing After Whipping
Deflates the cream.
Professional Dessert Presentation Tips
Simple presentation tricks make homemade desserts look bakery-quality.
Use Clear Glasses
Beautifully showcases layers.
Pipe the Cream
Creates cleaner layers.
Add Toppings Last Minute
Keeps crunchy toppings crisp.
Drizzle Syrups
Chocolate or caramel adds visual appeal.
Use Color Contrast
Bright fruits or pistachios make desserts look vibrant.
Why Texture Contrast Matters
The reason this dessert feels satisfying is because of balanced textures.
Cream
Soft and airy.
Biscuits
Slightly firm or cake-like.
Nuts or Chocolate
Crunchy or chewy.
Fruits
Fresh and juicy.
This contrast keeps each bite interesting and prevents the dessert from feeling overly heavy.
Storage Tips
These dessert cups store very well when refrigerated.
Refrigerator Storage
Store covered for up to 2 days.
Best Texture
Enjoy within 24 hours for freshest layers.
Avoid Freezing
Freezing may affect whipped cream texture.
Frequently Asked Questions
Can I make this dessert ahead of time?
Yes. Chilling actually improves the texture.
Can I use whipped topping instead of cream?
Yes, though homemade whipped cream tastes fresher.
Which biscuits work best?
Digestive biscuits, Marie biscuits, and tea biscuits all work well.
Why did my cream not whip?
The cream may have been too warm or too low in fat.
Can I reduce the sweetness?
Absolutely. Adjust condensed milk or powdered sugar.
Why Easy Layered Desserts Are So Popular
People love desserts that combine:
- Minimal effort
- Beautiful presentation
- Rich flavor
- Creamy texture
- Quick preparation
This no-bake whipped cream dessert checks all those boxes while remaining affordable and beginner-friendly.
The combination of:
- Airy whipped cream
- Soft biscuit layers
- Chocolate or fruit additions
- Creamy sweetness
creates a dessert that feels comforting, elegant, and irresistible.
A Quick Homemade Dessert That Feels Luxurious
This layered whipped cream dessert recipe proves that simple ingredients can create something that looks and tastes impressive.
With just cream, biscuits, condensed milk, and a few flavor additions, you can prepare:
- A bakery-style dessert
- A no-bake trifle
- A chilled cream parfait
- A quick party dessert
- A creamy layered sweet treat
Perfect for busy days, gatherings, or simple dessert cravings, these cream dessert cups deliver smooth texture, sweet flavor, and beautiful presentation in every spoonful.
Part 2: Easy No-Bake Layered Cream Dessert Recipe
Creamy Biscuit Dessert Cups with Whipped Cream
Prep Time
10 minutes
Chill Time
15–30 minutes
Total Time
25–40 minutes
Servings
4–6 dessert cups
Ingredients
Cream Base
- 1 cup cold heavy cream
- 3 tablespoons condensed milk
- 1/2 teaspoon vanilla essence
- 2 tablespoons powdered sugar (optional)
Biscuit Layer
- 6–8 digestive biscuits, tea biscuits, or Marie biscuits
Optional Add-Ins
Chocolate Options
- Chocolate chips
- Chopped chocolate
- Cocoa powder
Fruit Options
- Banana slices
- Mango cubes
- Chopped apples
Nut Options
- Almonds
- Cashews
- Pistachios
Optional Toppings
- Chocolate syrup
- Caramel sauce
- Whipped cream
- Crushed biscuits
- Nuts
- Cocoa powder
Kitchen Tools Needed
- Mixing bowl
- Hand whisk or electric beater
- Serving glasses or bowls
- Rolling pin or hands for crushing biscuits
Instructions
Step 1: Chill Equipment
Place the mixing bowl and whisk in the freezer for 5–10 minutes.
Keep the heavy cream refrigerated until ready to use.
Step 2: Whip the Cream
Pour cold heavy cream into the chilled bowl.
Whisk until soft peaks form.
Do not over-whip.
Step 3: Add Sweeteners and Flavor
Add:
- Condensed milk
- Vanilla essence
- Powdered sugar if desired
Mix gently until combined.
Step 4: Prepare Biscuits
Roughly crush the biscuits using hands or a rolling pin.
Keep some larger pieces for texture.
Step 5: Layer the Dessert
In serving glasses, layer:
- Crushed biscuits
- Whipped cream mixture
- Chocolate, fruit, or nuts
Repeat layers as desired.
Finish with a cream layer on top.
Step 6: Decorate
Top with:
- Chocolate syrup
- Crushed nuts
- Cocoa powder
- Extra biscuit crumbs
- Whipped cream swirl
Step 7: Chill and Serve
Refrigerate for 15–30 minutes for best texture.
Serve chilled.
Serving Suggestions
Perfect for:
- Parties
- Summer desserts
- Family gatherings
- Quick sweet cravings
- Holiday dessert tables
Storage Instructions
- Refrigerate up to 2 days
- Keep covered
- Add crunchy toppings before serving
Approximate Nutrition Per Serving
| Nutrient | Amount |
|---|---|
| Calories | 320 kcal |
| Carbohydrates | 28 g |
| Protein | 4 g |
| Fat | 22 g |
| Sugar | 18 g |
Pro Tip
For the best bakery-style texture, chill the dessert overnight so the biscuits soften into soft cake-like layers.