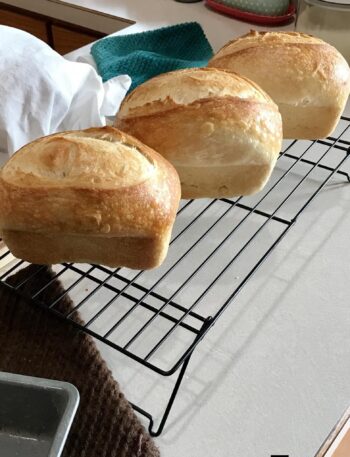
There’s something universally comforting about the aroma of freshly baked bread drifting through your kitchen. It signals warmth, simplicity, and nourishment. Yet, for many people, traditional bread baking feels intimidating—kneading dough, waiting for multiple rises, and mastering technique can seem overwhelming. That’s exactly why this easy no-knead seeded bread recipe is becoming one of the most searched homemade bread recipes for beginners online
This method removes all the complexity and replaces it with a relaxed, almost hands-off approach. You don’t need any special equipment, advanced baking skills, or hours of active work. Instead, this recipe relies on time, simple ingredients, and a clever baking technique to produce a loaf that looks and tastes like it came from an artisan bakery.
If you’ve ever wanted to bake bread at home without stress, this is your perfect starting point.
Why This No-Knead Bread Method Is So Popular Today
In today’s fast-paced lifestyle, people are searching for recipes that are not only delicious but also quick, simple, and reliable. This bread ticks all those boxes. It fits perfectly into trending categories like:
- Easy homemade bread recipes
- No-knead artisan bread
- Healthy seeded bread
- Beginner-friendly baking ideas
- Small batch bread recipes
What makes this recipe especially appealing is its minimal effort requirement. You simply mix the ingredients, let the dough rest, and bake. That’s it.
The Science Behind No-Knead Bread: How It Works Without Effort
Traditional bread recipes depend on kneading to develop gluten—the protein structure that gives bread its elasticity and chewiness. But in this method, kneading is replaced by time and hydration, making it a perfect example of slow fermentation baking.
Here’s what happens during the resting phase (8–12 hours):
- Flour gradually absorbs water, creating a hydrated dough
- Natural gluten networks form without manual effort
- Yeast slowly ferments, producing air bubbles
- Flavor becomes richer and more complex
This process creates a dough that is airy, slightly sticky, and full of life—exactly what you want for a perfect loaf.
What Makes Seeded Bread a Healthier Choice
One of the standout features of this recipe is the inclusion of mixed seeds, which transform a basic loaf into a nutrient-rich, high-fiber bread.
Common seeds used include:
- Flax seeds
- Sunflower seeds
- Sesame seeds
- Pumpkin seeds
These seeds are not just decorative—they offer real nutritional benefits:
- Healthy fats that support heart health
- Dietary fiber that improves digestion
- Plant-based protein for sustained energy
- A satisfying crunch that enhances texture
Because of these additions, this recipe is often searched as a healthy homemade bread recipe or high-fiber bread option.
Why Baking Bread in a Jar Is a Game-Changer
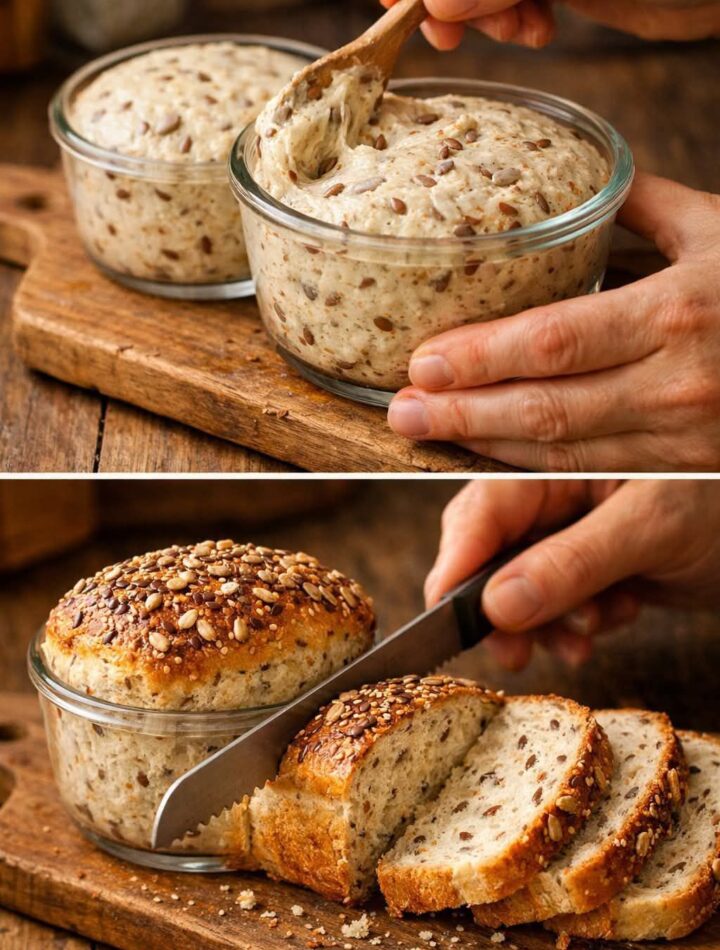
Unlike traditional loaf pans, this recipe uses a jar or small baking dish, which creates a unique baking environment. This technique is especially useful for people with limited kitchen tools or space.
Benefits of jar baking include:
- A compact, tall loaf shape
- Moist interior with a soft crumb
- Even heat distribution
- Easy handling and portion control
The jar essentially acts like a mini oven within your oven, helping the bread rise upward while retaining moisture.
Breaking Down the Ingredients (And Why They Matter)
Each ingredient in this recipe has a specific purpose, and understanding them helps ensure success every time.
All-Purpose Flour
This forms the structure of your bread. It’s versatile and produces a soft yet stable crumb.
Instant Yeast
A small amount is enough to activate the fermentation process. It works slowly over time, creating flavor and rise.
Salt
Enhances flavor and strengthens the dough structure.
Warm Water
Activates the yeast and hydrates the flour. It should be warm—not hot—to avoid damaging the yeast.
Mixed Seeds
Provide texture, nutrition, and a rustic appearance.
Honey or Olive Oil (Optional)
Adds a subtle sweetness or richness, improving both flavor and softness.
The Secret to Perfect Texture: Crispy Outside, Soft Inside
A great loaf of bread is defined by contrast—a crisp crust and a soft, airy interior. This recipe achieves that balance through:
- High hydration dough (slightly sticky consistency)
- Long resting time for natural fermentation
- Minimal handling to preserve air bubbles
- Proper oven temperature for even baking
The result is a loaf that is golden on the outside and tender on the inside.
The No-Stress Baking Philosophy
This recipe embraces imperfection. Unlike traditional baking, where precision is critical, this method encourages a more relaxed approach.
Keep these principles in mind:
- Sticky dough is a good sign
- Longer resting equals better flavor
- Less handling leads to softer bread
You don’t need to shape the dough perfectly—it will naturally settle into place during baking.
Creative Ways to Customize Your Bread
While the base recipe remains unchanged, you can enhance it with optional additions to suit your taste:
- Add dried herbs like rosemary or thyme for aroma
- Mix in shredded cheese for a richer flavor
- Replace part of the flour with whole wheat for added fiber
- Include dried fruits and nuts for a slightly sweet variation
These variations allow you to create multiple versions from one simple base.
Serving Ideas for Every Meal
This seeded bread is incredibly versatile and works for both sweet and savory dishes:
- Spread with butter or honey for breakfast
- Serve alongside soups or stews
- Use as sandwich bread
- Toast and top with avocado or eggs
- Pair with cheese, dips, or spreads
Its neutral yet slightly nutty flavor complements almost anything.
Health Benefits of Making Bread at Home
Homemade bread offers several advantages over store-bought options:
- No artificial preservatives
- Controlled sodium levels
- Higher fiber content from seeds
- Easier digestion due to fermentation
- Customizable ingredients
This makes it ideal for those following clean eating or balanced diet plans.
Common Mistakes and How to Avoid Them
Even though this recipe is simple, a few mistakes can affect the outcome:
- Using water that’s too hot (kills yeast)
- Not allowing enough resting time
- Overmixing the dough
- Forgetting to grease the jar
- Cutting the bread while it’s too hot
Avoiding these ensures consistent, bakery-quality results.
How to Store Your Bread Properly
To keep your bread fresh and delicious:
- Store at room temperature in an airtight container
- Consume within 2–3 days
- Slice only when needed
- Avoid refrigeration (it dries out the bread)
You can also freeze slices for longer storage and toast them when needed.
Why This Recipe Fits Modern Cooking Trends
Today’s home cooks prefer recipes that are:
- Simple and quick
- Budget-friendly
- Nutritious
- Minimal effort
This no-knead seeded jar bread meets all these needs, making it one of the most practical recipes for modern kitchens.
Final Thoughts: A Simple Bread Recipe You’ll Keep Coming Back To
This recipe proves that baking bread doesn’t have to be complicated. With just a few ingredients and a little patience, you can create something truly special.
Once you try it, it’s likely to become a regular part of your routine—not just because it’s easy, but because it delivers consistent, delicious results every time.
Part 2: Simple & Easy Recipe Instructions
Step 1: Combine Dry Ingredients
In a mixing bowl, add all-purpose flour, salt, instant yeast, and mixed seeds. Stir until evenly distributed.
Step 2: Add Liquid
Pour in warm water and mix using a spoon or spatula until a sticky dough forms. Add honey or olive oil if using.
Step 3: Let the Dough Rest
Cover the bowl and leave it at room temperature for 8–12 hours. The dough should become bubbly and double in size.
Step 4: Prepare Baking Container
Lightly grease a heat-safe jar or small baking dish to prevent sticking.
Step 5: Transfer Dough
Gently place the dough into the prepared container. Sprinkle extra seeds on top for added texture.
Step 6: Bake the Bread
Preheat your oven to 375°F (190°C). Bake for 30–40 minutes until the crust turns golden brown.
Step 7: Cool Before Serving
Allow the bread to cool slightly before slicing to maintain the perfect texture.
Quick Tips
- Always use warm (not hot) water
- Keep dough slightly sticky
- Allow full resting time for best flavor
- Grease container properly
- Tap the bread—if it sounds hollow, it’s done
Nutritional Overview (Approximate)
- Calories: Moderate
- Fiber: High (from seeds)
- Protein: Moderate
- Healthy fats: Present