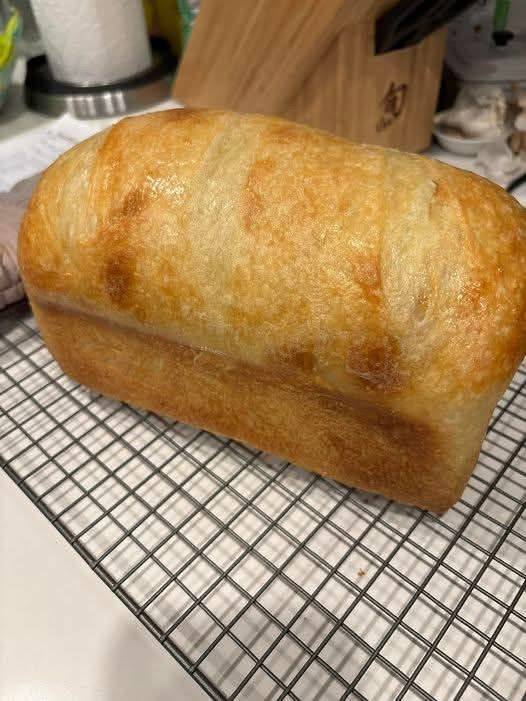
A Classic Homemade Bread That Brings Comfort to Your Kitchen
There’s something truly special about baking your own bread, and this soft sourdough sandwich bread recipe captures that feeling perfectly. From the moment you mix your dough to the time you slice into a freshly baked loaf, the entire process feels rewarding, calming, and deeply satisfying. This bread is known for its soft interior, slightly chewy crust, and signature tangy flavor that comes from natural fermentation.
Unlike store-bought loaves, homemade sourdough bread delivers a rich aroma and taste that fills your kitchen with warmth. It’s the kind of bread that instantly makes any meal feel more wholesome—whether you’re preparing toast for breakfast or building a hearty sandwich for lunch.
Why Sourdough Sandwich Bread Is So Popular
In recent years, homemade sourdough bread has become one of the most searched baking recipes, and for good reason. People are moving toward natural fermentation baking, appreciating the depth of flavor and health benefits it offers.
This sourdough sandwich bread stands out because it combines the traditional sourdough taste with a soft, sliceable texture perfect for everyday use. Unlike rustic artisan loaves that can be crusty and dense, this version is designed to be light, fluffy, and ideal for sandwiches.
The Magic of Natural Fermentation
What makes sourdough unique is its reliance on a live starter instead of commercial yeast. This starter contains natural wild yeast and beneficial bacteria that slowly ferment the dough.
This process not only creates the bread’s signature tangy flavor but also improves digestibility. Many people find sourdough easier on the stomach compared to regular bread because the fermentation helps break down gluten and sugars.
Additionally, sourdough has a lower glycemic impact, making it a preferred choice for those aiming for balanced energy levels throughout the day.
Texture, Taste & Aroma Experience
The beauty of this bread lies in its balance. The inside crumb is soft, airy, and tender—perfect for slicing—while the outer crust is lightly golden with a gentle chew.
Flavor-wise, it offers a mild tang that pairs beautifully with both sweet and savory toppings. Spread butter and jam on a slice for breakfast, or use it for grilled sandwiches—the versatility is endless.
And then there’s the aroma. Few things compare to the smell of freshly baked sourdough bread. It creates a cozy atmosphere that makes your kitchen feel like the heart of your home.
A Perfect Recipe for Mindful Baking
Making sourdough sandwich bread is more than just cooking—it’s an experience. It encourages patience and attention to detail, from feeding your starter to allowing the dough to rise slowly.
This makes it an excellent weekend activity or a relaxing hobby for anyone interested in artisan bread baking at home. Each step teaches you something new, and every loaf you bake improves your skills.
Health Benefits of Sourdough Bread
This bread isn’t just delicious—it also offers several nutritional advantages:
- Improved digestion due to fermentation
- Better nutrient absorption
- Natural probiotics (in the starter stage)
- Lower sugar impact compared to regular bread
- Rich in essential minerals like iron and calcium
Because of these benefits, sourdough is often included in healthy bread recipes and clean eating diets.
Essential Tips for Perfect Results
To make the best sourdough sandwich bread, keep these key tips in mind:
1. Use an Active Starter
Your starter should be bubbly and doubled in size before use. This ensures proper rise and flavor.
2. Don’t Rush Fermentation
Slow fermentation is the secret to great flavor. Give the dough enough time to develop naturally.
3. Maintain Proper Dough Hydration
A slightly sticky dough is ideal. Avoid adding too much flour too early.
4. Knead Until Elastic
Proper kneading develops gluten, giving your bread structure and softness.
5. Control Temperature
Warm environments speed up fermentation, while cooler temperatures slow it down.
6. Bake with Steam
Adding steam in the oven helps create a soft crust and better rise.
Creative Variations to Try
Once you master the basic recipe, you can customize it easily:
- Add whole wheat flour for a nutty flavor
- Mix in seeds like sunflower or flax for extra nutrition
- Use honey for a slightly sweet loaf
- Add milk powder for extra softness
- Try herbs for a savory twist
These variations allow you to create your own signature loaf.
Storage & Freshness Tips
Homemade sourdough bread stays fresh longer than regular bread when stored properly:
- Keep at room temperature in a cloth or airtight container for up to 3 days
- Slice and freeze for longer storage
- Toast slices directly from frozen when needed
Why This Recipe Stands Out
This sourdough sandwich bread is the perfect balance between tradition and practicality. It delivers the deep flavor of sourdough while maintaining the softness needed for everyday use.
It’s beginner-friendly yet rewarding enough for experienced bakers. Most importantly, it transforms simple ingredients into something truly special.
A Final Word on Homemade Bread
Baking your own sourdough bread is more than just making food—it’s about creating something meaningful. Each loaf reflects time, patience, and care.
Once you start baking your own bread, you’ll likely find it hard to go back to store-bought options. The taste, texture, and experience are simply unmatched.
Part 2: Easy Sourdough Sandwich Bread Recipe
Ingredients
- 1 cup (240g) active sourdough starter
- 1½ cups (360ml) warm water
- 4 cups (480g) all-purpose or bread flour
- 2 tablespoons sugar
- 2 tablespoons unsalted butter (softened)
- 1½ teaspoons salt
- 1 tablespoon olive oil (for greasing)
Optional:
- 2 tablespoons milk powder
- 1 tablespoon honey
Instructions
- Ensure your sourdough starter is active and bubbly.
- In a bowl, mix starter and warm water until dissolved.
- Add sugar and butter, mix well.
- Add flour, salt, and optional ingredients. Mix into dough.
- Knead for 8–12 minutes until soft and elastic.
- Place in oiled bowl, cover, and let rise 4–6 hours.
- Shape into a loaf and place in greased pan.
- Let it proof for 2–4 hours until risen.
- Preheat oven to 375°F (190°C).
- Bake for 35–40 minutes until golden brown.
- Cool completely before slicing.
Nutrition (Approx.)
Whole loaf:
- Calories: 1650 kcal
- Carbs: 320g
- Protein: 48g
- Fat: 28g
Per slice (12 slices):
- Calories: 138 kcal
- Carbs: 26.6g
- Protein: 4g
- Fat: 2.3g
Disclaimer
This recipe is for general informational purposes. Nutritional values may vary depending on ingredients used. Consult a professional for specific dietary needs.