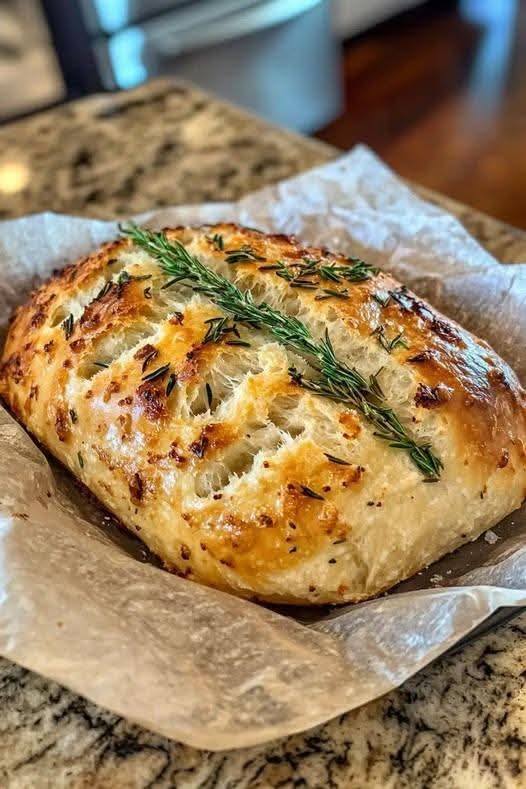
There is something truly special about baking homemade bread, especially when it fills your kitchen with the irresistible aroma of fresh herbs and roasted garlic. This rustic no-knead rosemary garlic bread is the perfect combination of simplicity and flavor, delivering a bakery-style loaf with minimal effort.
Unlike traditional bread recipes that require kneading and advanced techniques, this version is designed for ease. With just a few pantry ingredients and a bit of patience, you can create a beautifully crusty loaf with a soft, airy interior that rivals artisan bakery bread.
This recipe is ideal for beginners and experienced bakers alike. Whether you are serving it alongside soups, pairing it with pasta, or enjoying it with olive oil, this bread is guaranteed to impress.
Why This No-Knead Bread Recipe Is So Popular
In recent years, no-knead bread recipes have gained immense popularity, and for good reason.
Here’s why this recipe stands out:
- No kneading required – perfect for beginners
- Minimal ingredients with maximum flavor
- Long fermentation enhances taste and texture
- Crispy crust with soft interior
- Infused with fresh rosemary and roasted garlic
This method allows anyone to bake artisan-style bread at home without complicated techniques.
What Makes No-Knead Bread Unique
The secret behind no-knead bread lies in time rather than effort.
Instead of kneading, the dough develops gluten naturally during a long resting period. This process creates a structure that results in:
- Airy crumb
- Chewy texture
- Crisp crust
The result is a loaf that looks and tastes like it came from a professional bakery.
Flavor Profile: Herbaceous, Savory, and Comforting
This bread offers a rich and satisfying flavor experience:
- Earthy aroma from fresh rosemary
- Sweet, mellow depth from roasted garlic
- Subtle richness from olive oil
- Balanced saltiness enhancing overall taste
Every bite delivers warmth and comfort.
Understanding the Ingredients
Flour: The Foundation
All-purpose flour works well, but bread flour can give a slightly chewier texture.
Salt: Essential for Flavor
Salt enhances taste and strengthens the dough structure.
Yeast: The Leavening Agent
A small amount of yeast allows the dough to rise slowly over time.
Warm Water: Activates the Dough
Warm water helps combine ingredients and activates the yeast.
Rosemary: Fresh Herb Flavor
Fresh rosemary adds a fragrant, earthy note that defines this bread.
Roasted Garlic: Sweet & Savory Depth
Roasting garlic softens its sharpness and brings out natural sweetness.
Olive Oil: Optional Richness
Adds moisture and enhances flavor.
How to Roast Garlic for Maximum Flavor
Roasting garlic is simple and transforms its flavor completely.
Steps to Roast Garlic
- Wrap garlic cloves in foil
- Drizzle with olive oil
- Bake until soft and golden
The result is a creamy, spreadable garlic with a mild, sweet flavor.
Mixing the Dough: Simple and Quick
The beauty of this recipe lies in its simplicity.
Steps
- Combine dry ingredients
- Add water and flavorings
- Mix until a sticky dough forms
No kneading is required—just mix and let time do the work.
The Long Rise: Key to Perfect Texture
The dough rests for 12–18 hours at room temperature.
What Happens During This Time
- Yeast ferments slowly
- Gluten develops naturally
- Flavor deepens
This step is crucial for achieving the signature artisan texture.
Shaping Without Kneading
After the first rise:
- Turn dough onto a floured surface
- Gently shape into a ball
- Avoid overhandling
This preserves the air bubbles formed during fermentation.
Second Rest: Final Preparation
Let the shaped dough rest for 30–40 minutes.
This allows it to relax and prepare for baking.
Why a Dutch Oven Is Important
A Dutch oven creates a steam-filled environment, which helps develop:
- Crispy crust
- Even baking
- Professional-quality texture
Baking Process Explained
Preheating
Preheat oven with the Dutch oven inside to ensure high heat.
Covered Baking
Bake with the lid on to trap steam.
Uncovered Baking
Remove lid to allow the crust to brown and crisp.
How to Know When Bread Is Done
- Golden brown crust
- Hollow sound when tapped
- Firm outer texture
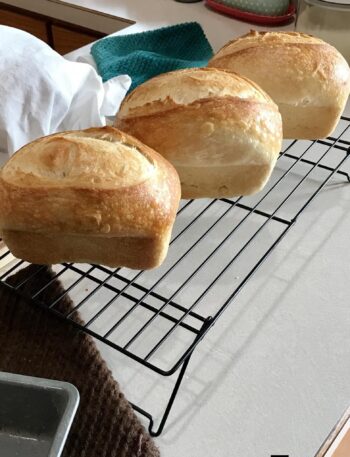
Cooling: A Crucial Step
Let the bread cool completely before slicing.
This allows the interior to set properly.
Expert Tips for Perfect Bread
Use Fresh Ingredients
Fresh rosemary and garlic enhance flavor.
Don’t Rush the Rise
Time is essential for flavor development.
Handle Dough Gently
Preserve air pockets for a light texture.
Preheat Properly
A hot oven ensures a good crust.
Serving Ideas
This bread pairs beautifully with:
- Soups and stews
- Pasta dishes
- Olive oil dips
- Cheese platters
Storage Tips
Room Temperature
Store in a paper bag or bread box.
Avoid Refrigeration
This can dry out the bread.
Creative Variations
🧀 Cheese Addition
Add grated cheese for extra richness.
🌶️ Spicy Version
Add chili flakes for heat.
🌿 Herb Blend
Mix rosemary with thyme or oregano.
Common Mistakes to Avoid
- Using water that is too hot
- Skipping long rise time
- Overhandling dough
Why You’ll Love This Recipe
- Easy to make
- Minimal effort
- Incredible flavor
- Bakery-style results
Final Thoughts
This rustic no-knead rosemary garlic bread proves that amazing bread doesn’t require complicated techniques. With patience and simple ingredients, you can create a loaf that is crispy, flavorful, and deeply satisfying.
.
🍞 Part 2: Simple No-Knead Rosemary Garlic Bread Recipe
Quick & Easy Version
Ingredients
- 3 cups all-purpose flour (or bread flour)
- 2 teaspoons salt
- ½ teaspoon instant yeast
- 1½ cups warm water
- 2 tablespoons fresh rosemary (chopped)
- 4 cloves roasted garlic (mashed)
- 1 tablespoon olive oil (optional)
Instructions
1. Mix Dough
Combine flour, salt, and yeast. Add water, rosemary, garlic, and olive oil. Mix until sticky dough forms.
2. First Rise
Cover and let rest for 12–18 hours until doubled.
3. Shape Dough
Turn onto floured surface, shape into a ball, and rest for 30–40 minutes.
4. Preheat Oven
Heat oven to 450°F (230°C) with Dutch oven inside.
5. Bake
Place dough in hot Dutch oven. Bake covered for 30 minutes, then uncovered for 10–15 minutes.
6. Cool & Serve
Let cool before slicing.
Tips
- Roast garlic beforehand
- Sprinkle sea salt on top for extra flavor
- Store properly to keep crust crisp